Categories
Blog posts In Progress Internet Nature Quilts New quilts Older Posts- Stylized Flowers Art Quilts The internet Uncategorized What's new?

That’s a Wrap, Hollyhocks and Ladybugs

BarbaraHarmsFiber Art Red Hollyhock Quilt


I’ve been working busily on my hollyhock quilt and now it’s finished. I’m a bit disappointed that it’s over, it was a really enjoyable project. I need to catch up on a few things and then officially start on my next commissioned quilt. I say “officially”, when in reality, I’ve been bouncing ideas around in my mind , long before today. I’ve done a few preliminary sketches, playing around with possibilities. I can already tell that I am going to find this an interesting project.

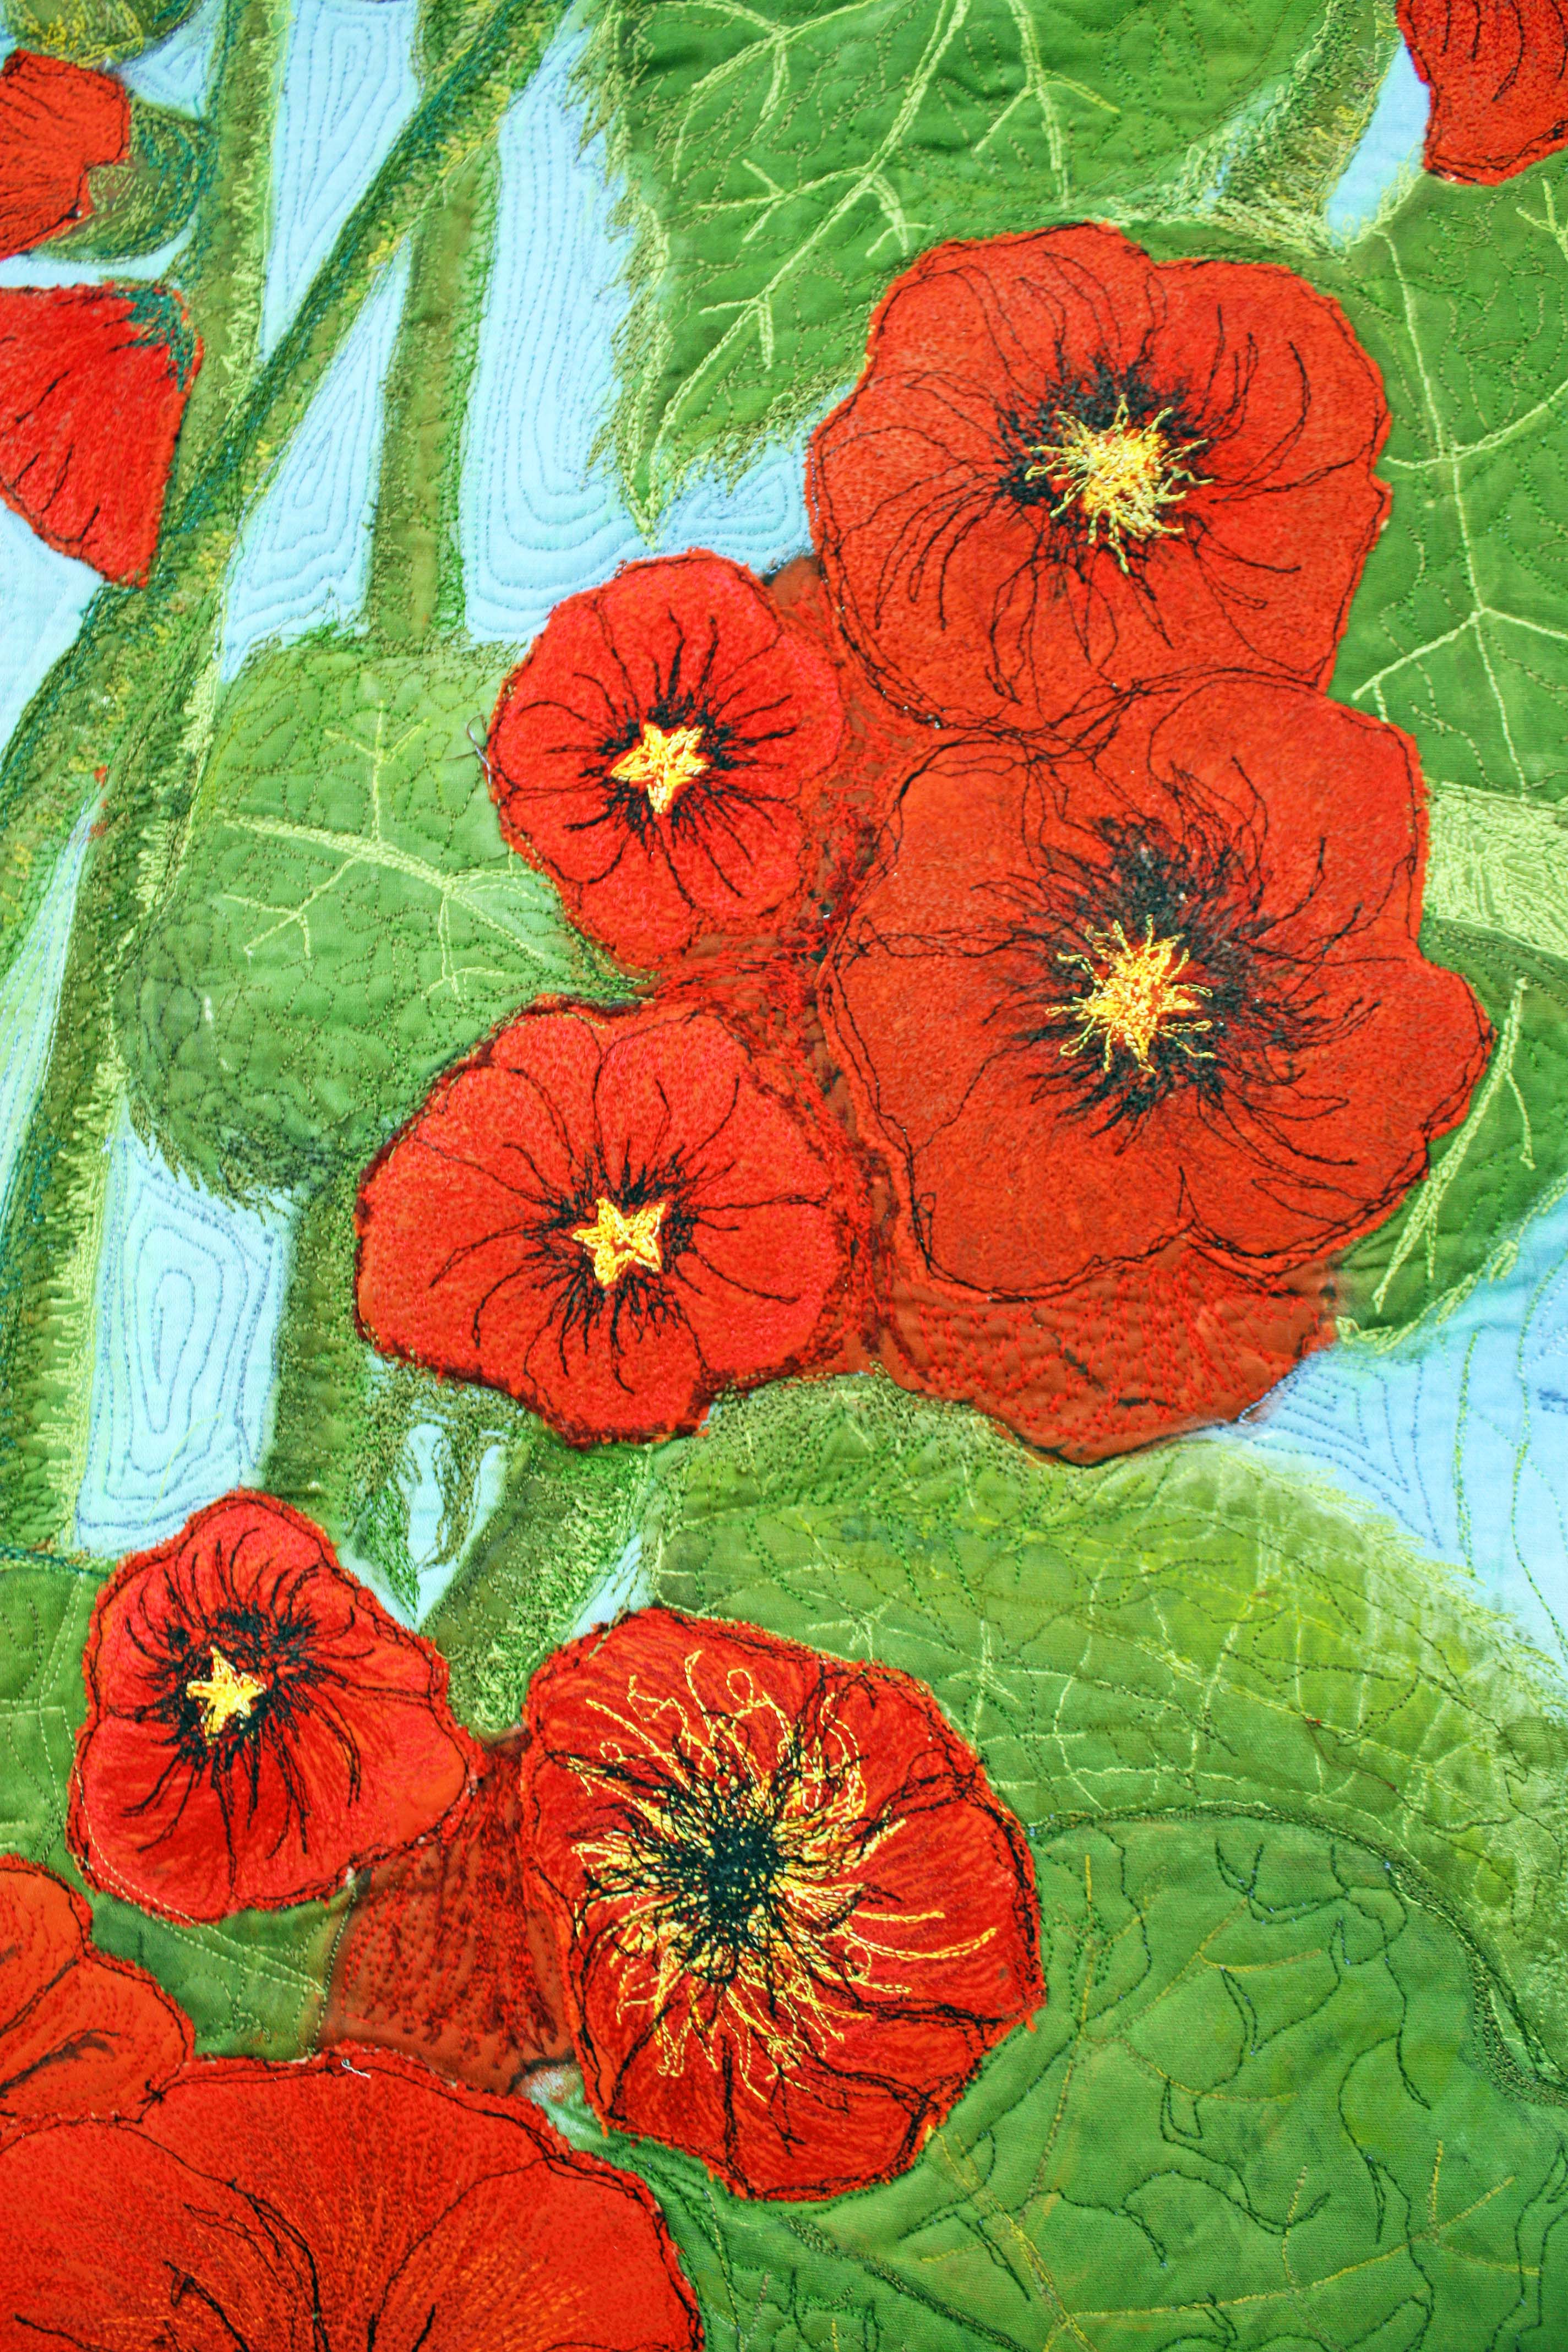
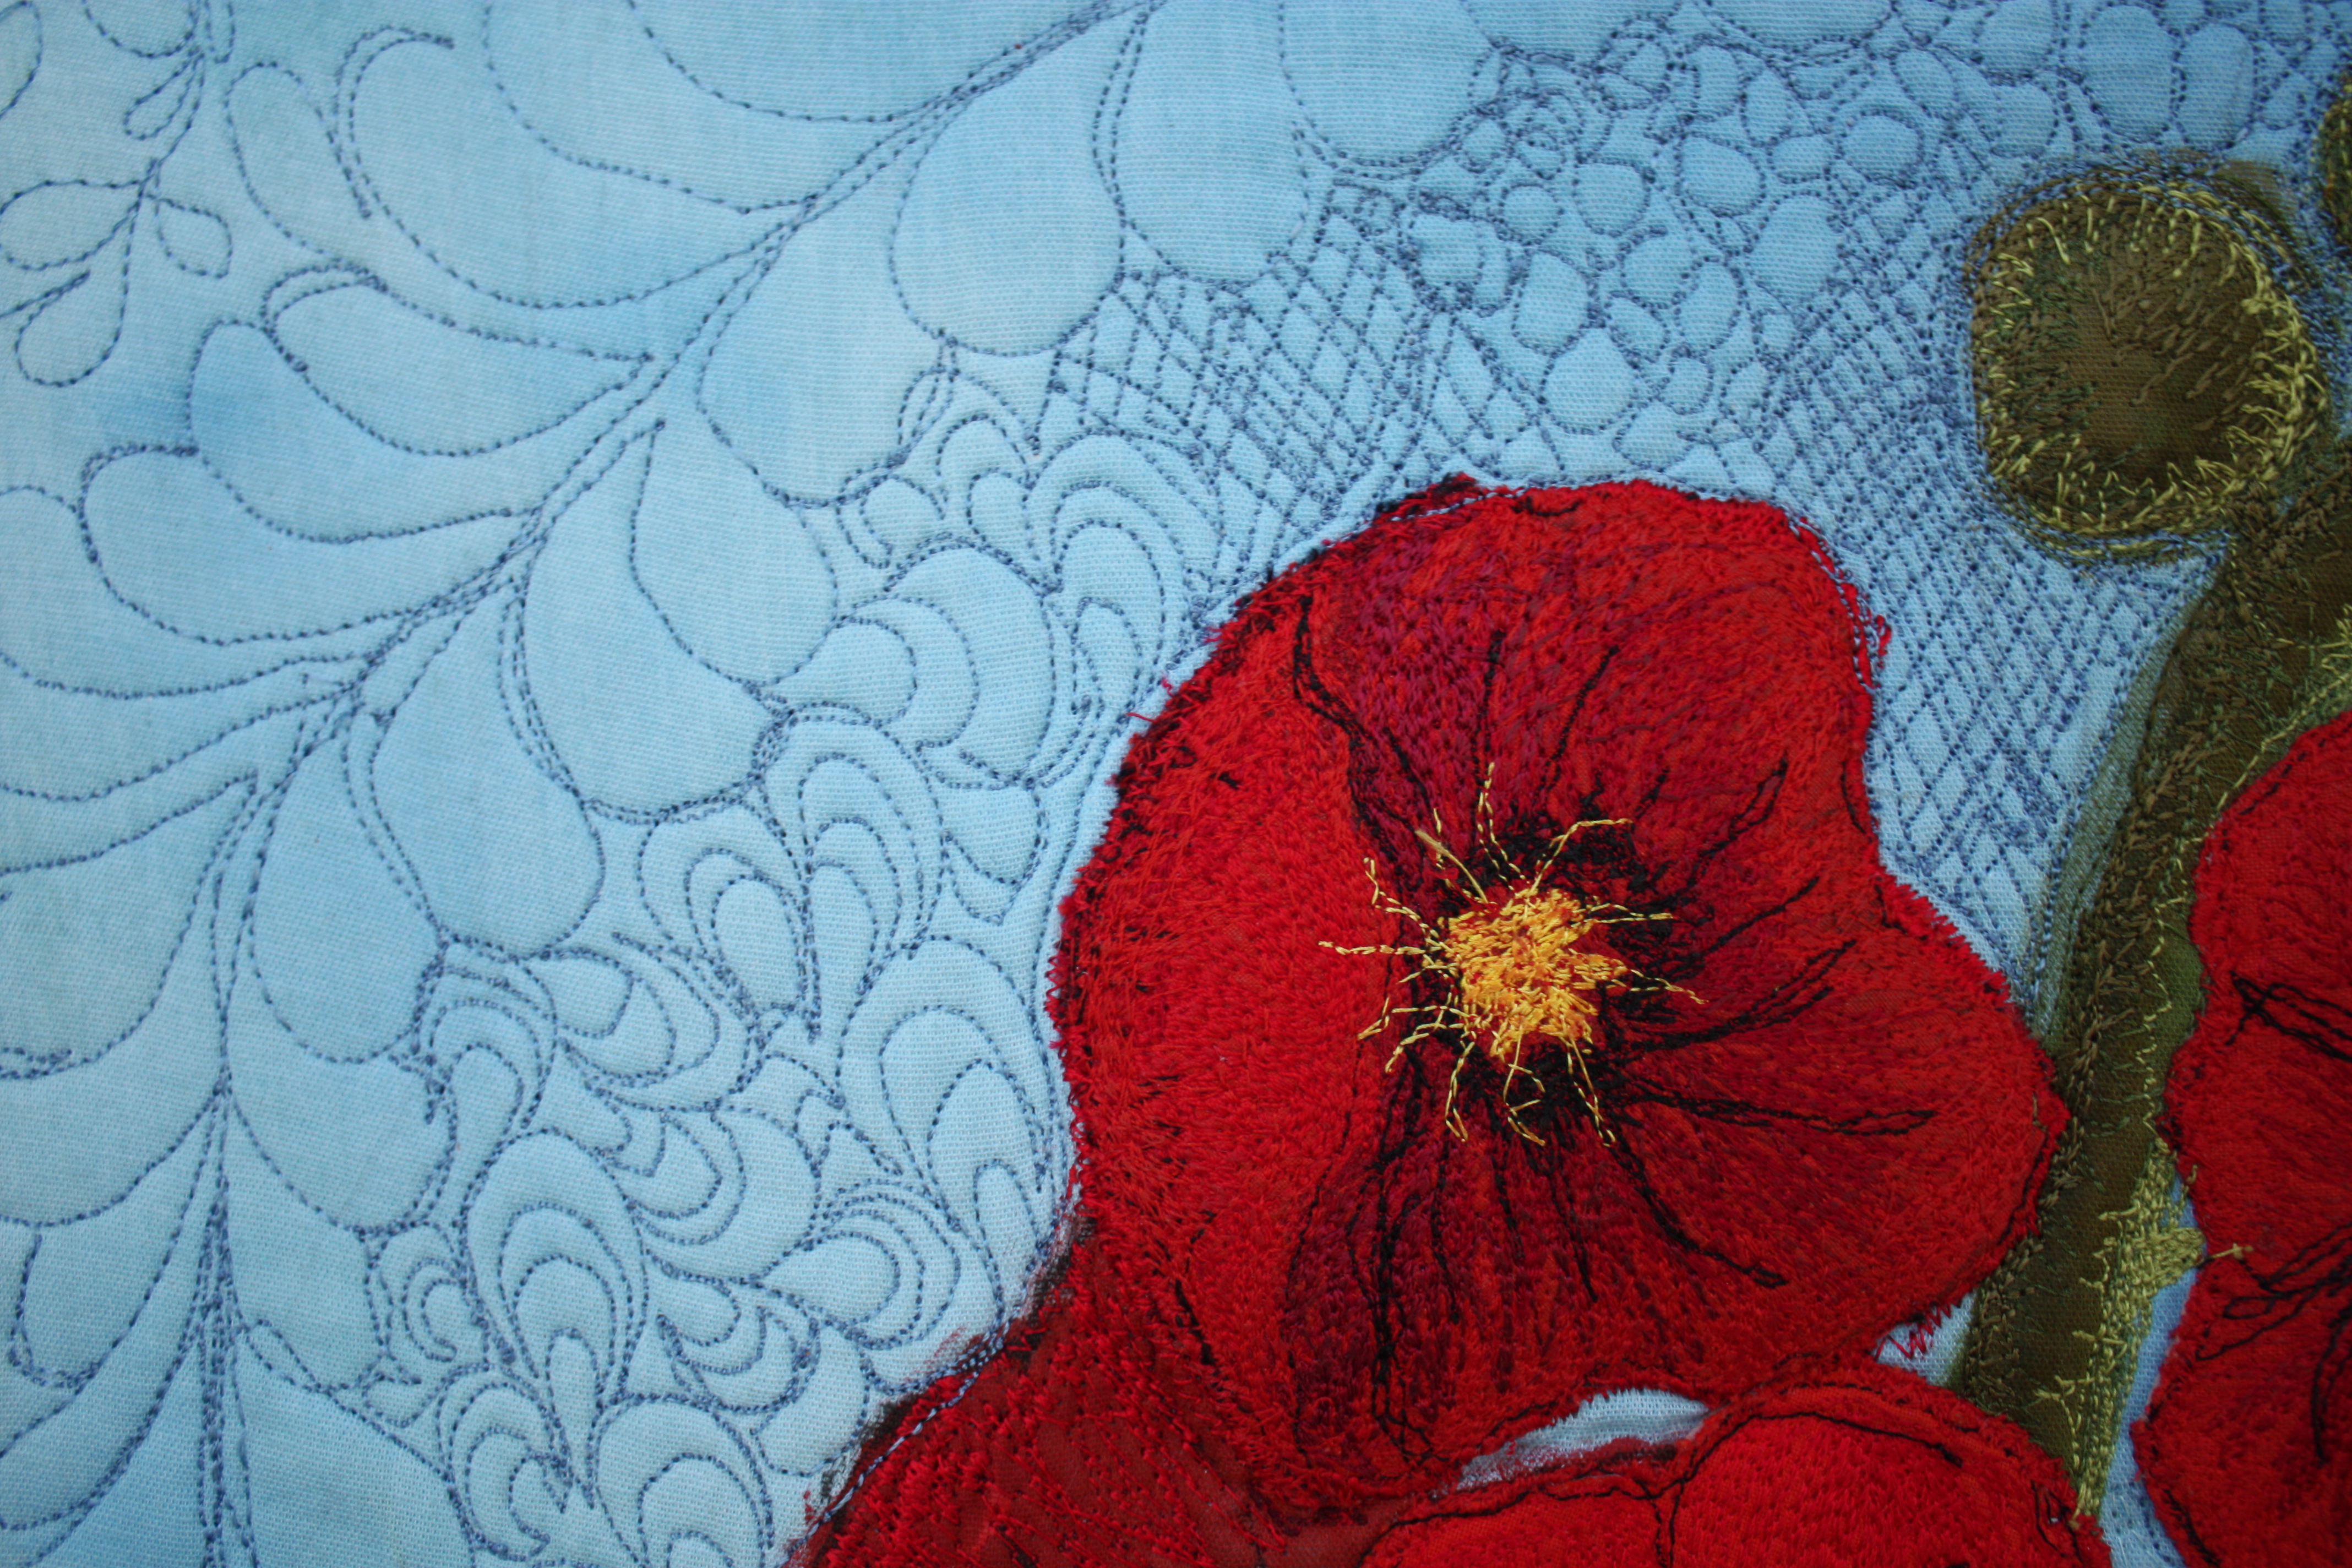
This red hollyhock art quilt was a commission. Commissions present an interesting challenge, I think it’s a beneficial to take a step back, and work on a theme that may not be your usual approach or subject matter. It might be stepping out of what has become your comfort zone.  For a commission to work, you need to translate it into your own interpretation of the subject. This was an easy quilt to capture my interest and spark my own enthusiasm.  It is a theme I enjoy working with. I love doing stylized flowers, and hollyhocks? Well goodness yes! That was a bit of a coincidence. My client loves hollyhocks, she even has their images on her business cards. When she received her quilt, I enclosed in the paperwork one of my older business cards, it also contained a wonderful image of hollyhocks . When this fact had first occurred to me, I had to  laugh, we were a good fit, my client and her artist.
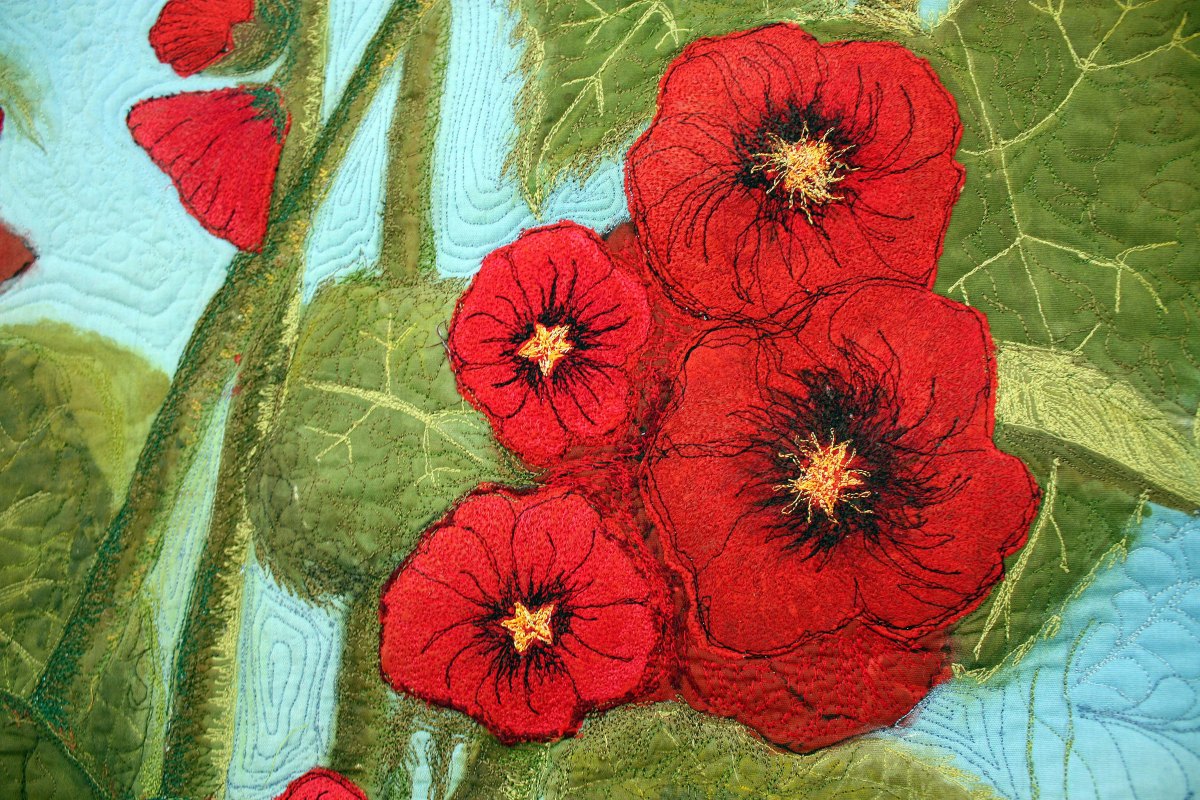
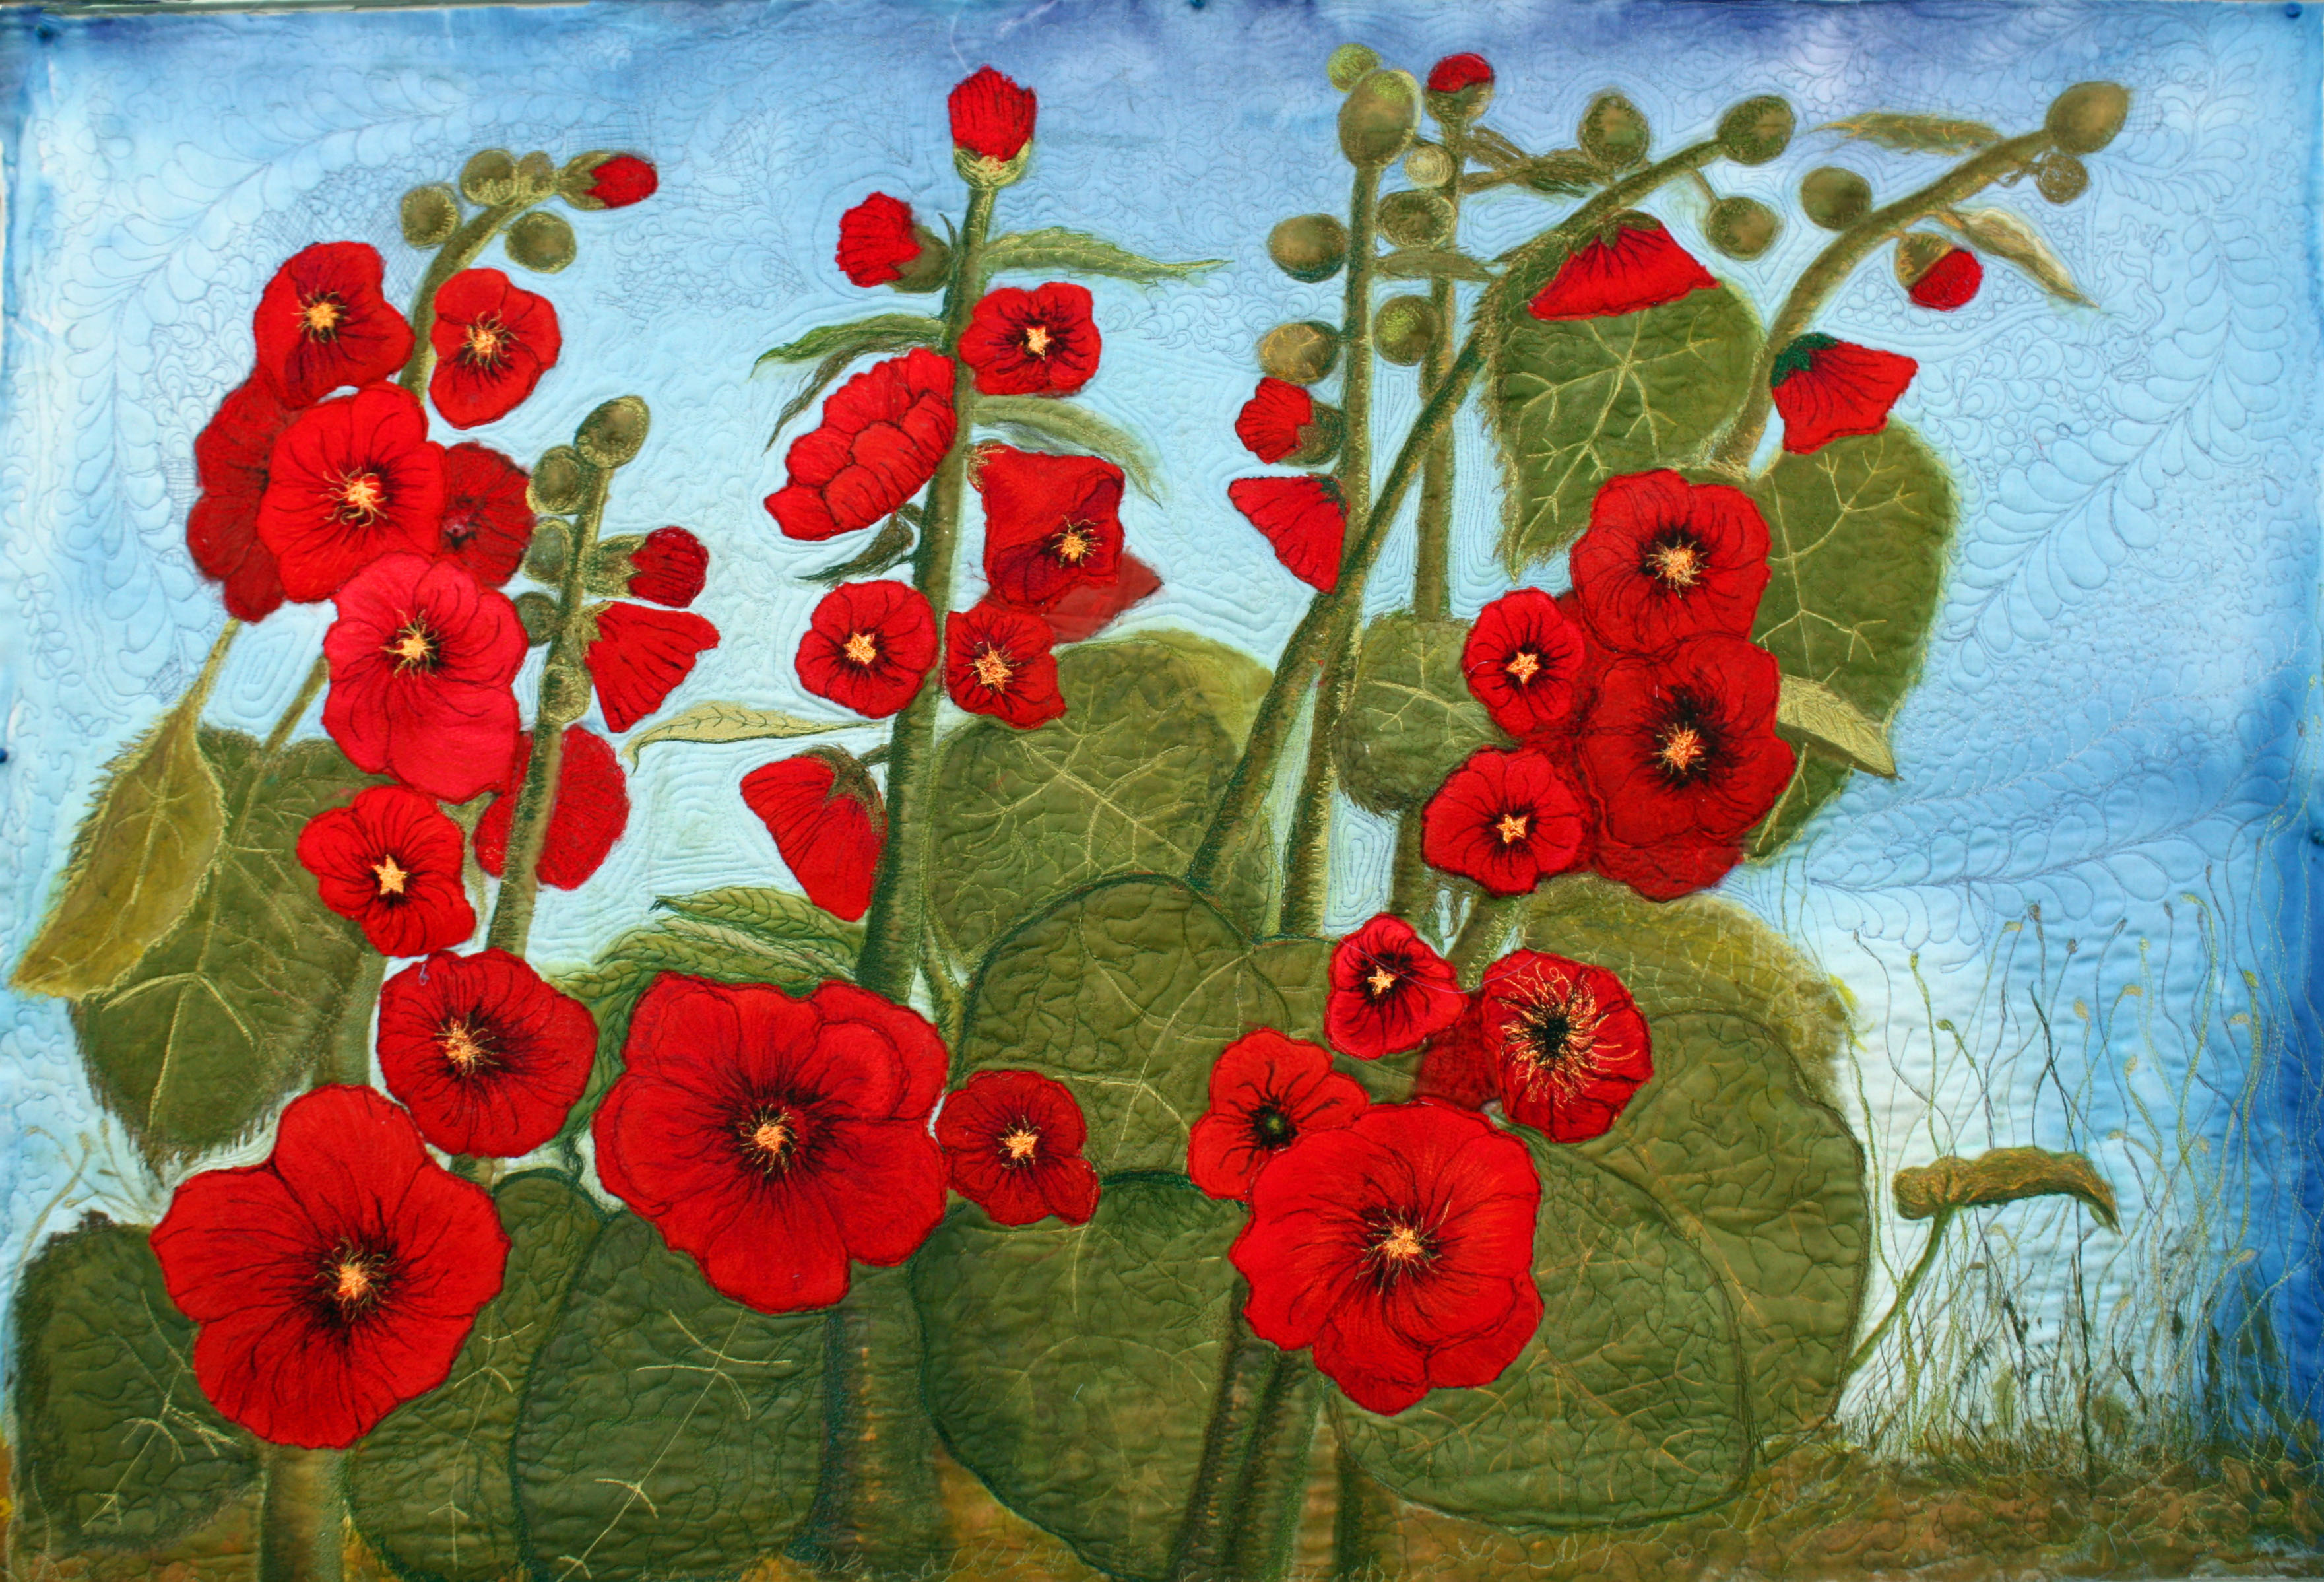
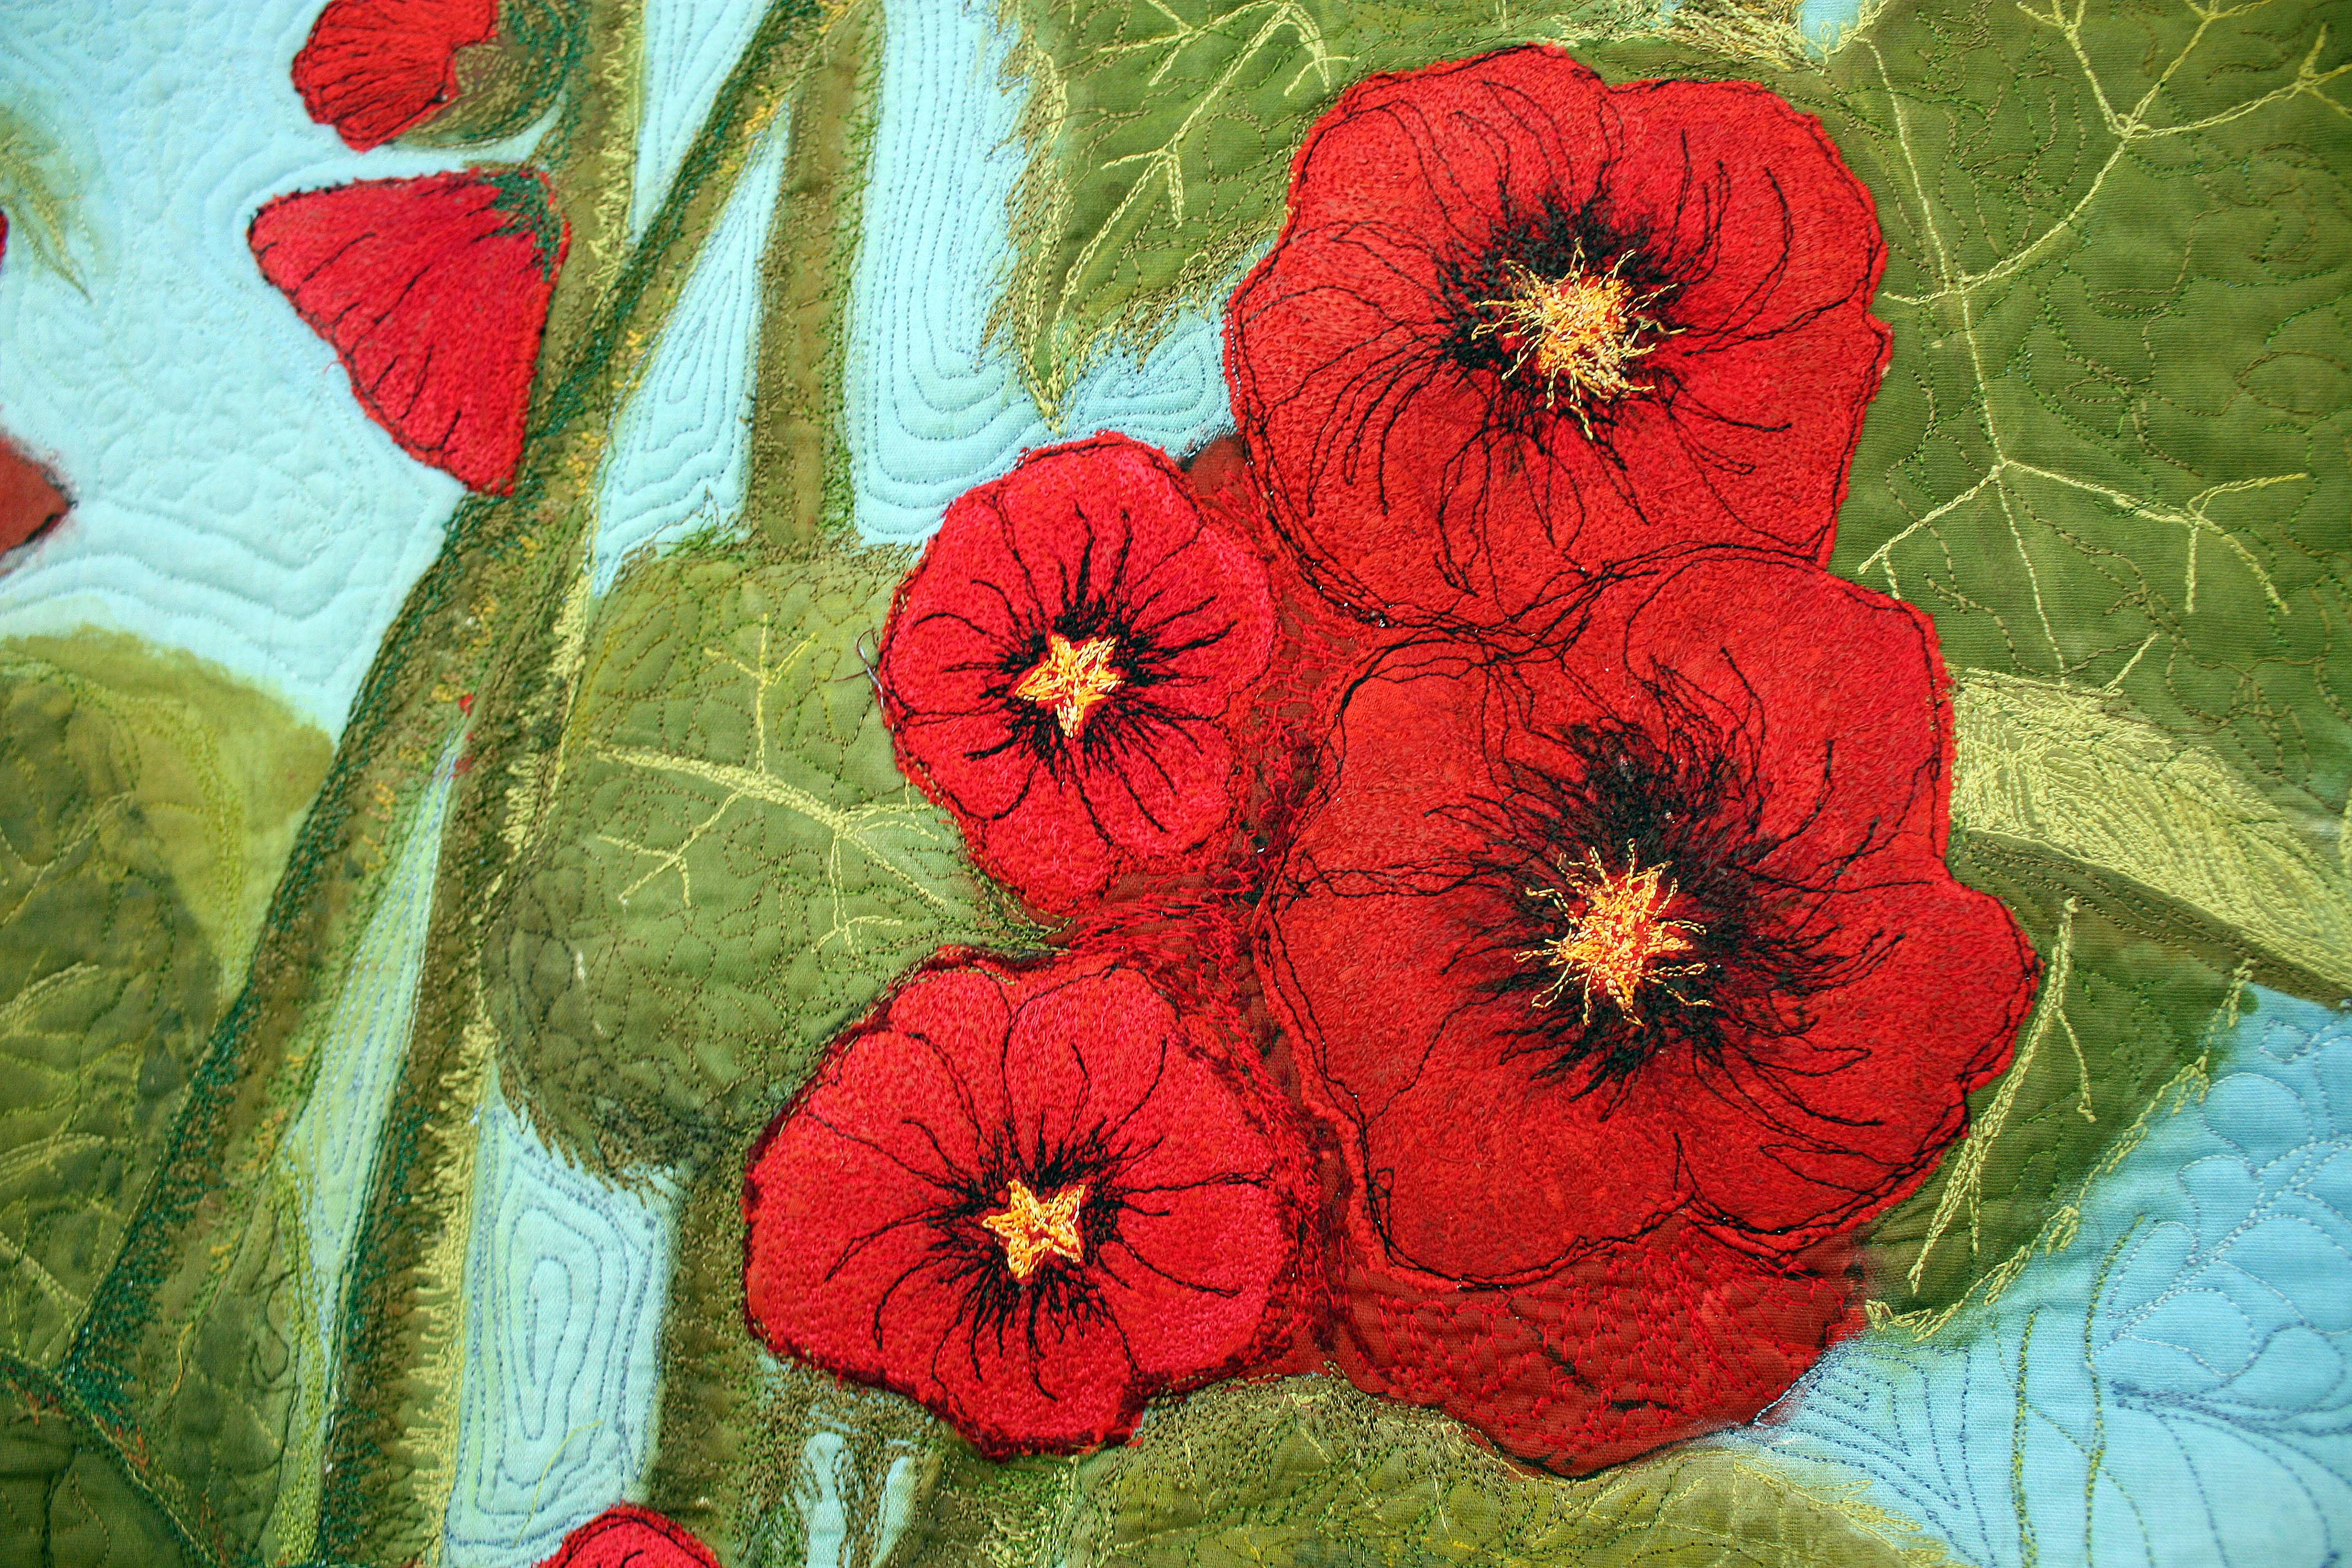
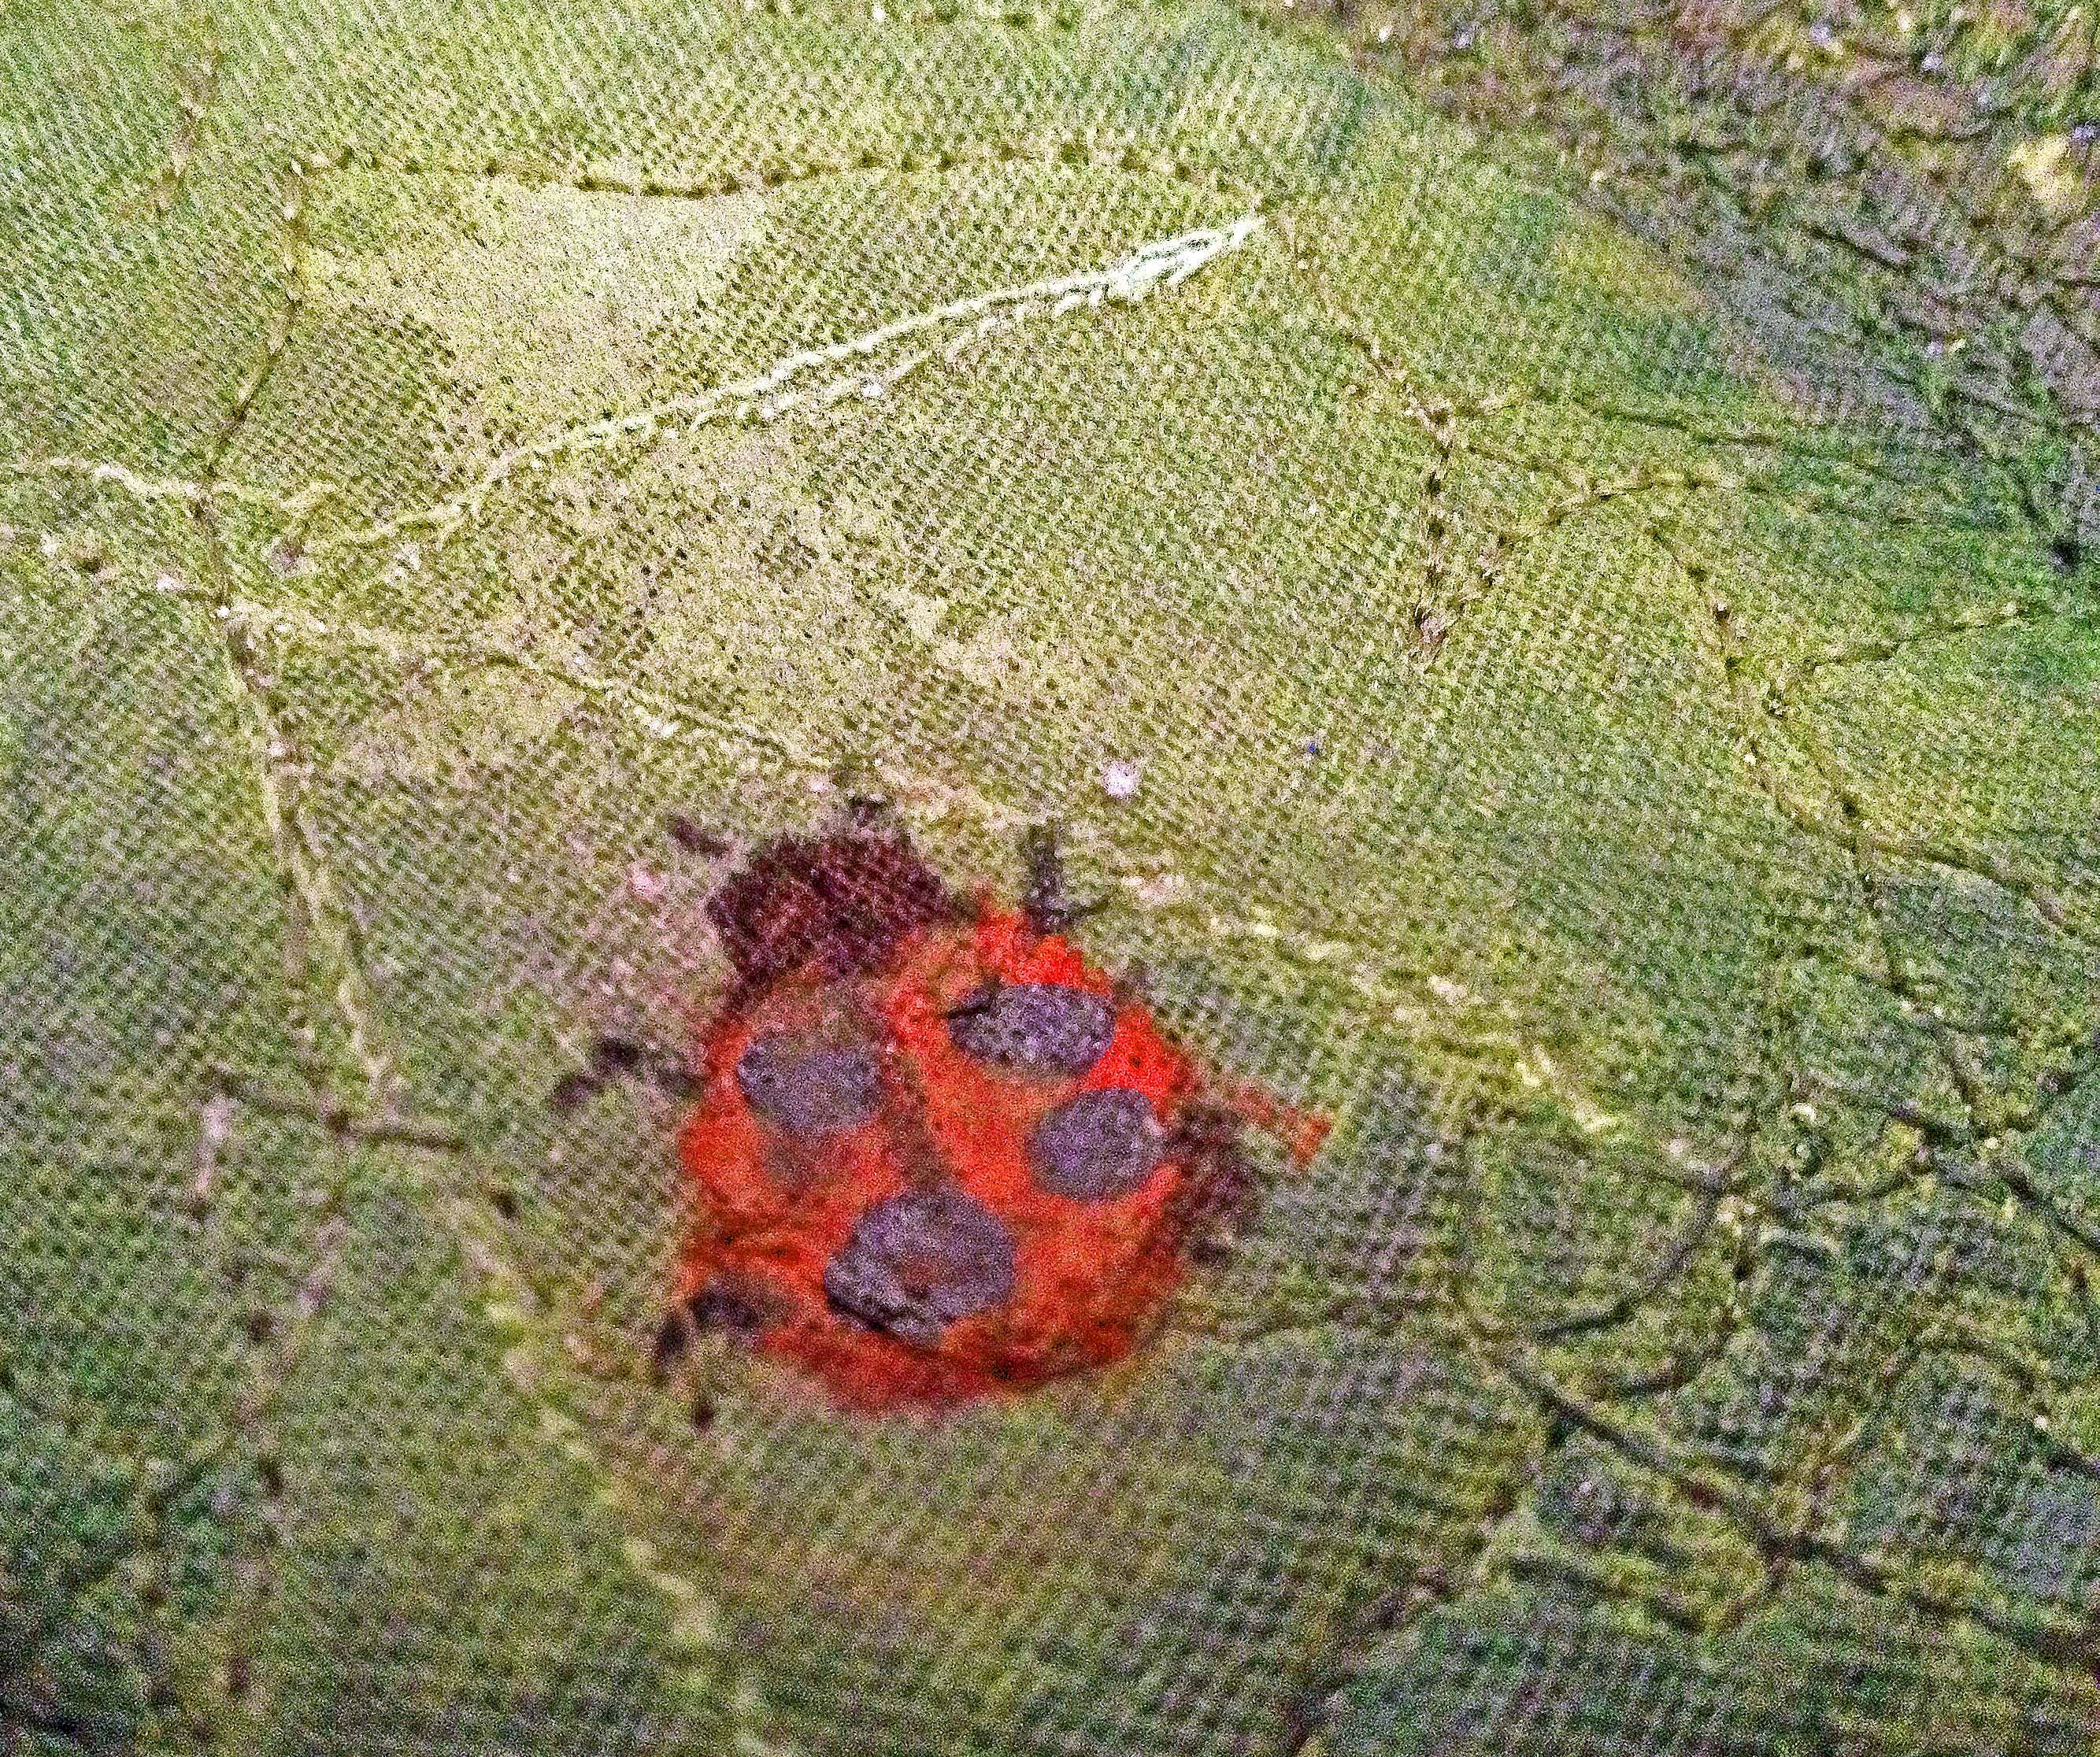
I’ve posted some pictures of the progress along the way. Now it’s finished, here’s the finished red hollyhock quilt. It has it’s title now, “A Bug’s Eye View”. As I worked on the finishing touches,  my husband stood there looking at  the nearly finished quilt. He decided it needed a little bug in it. Humm…

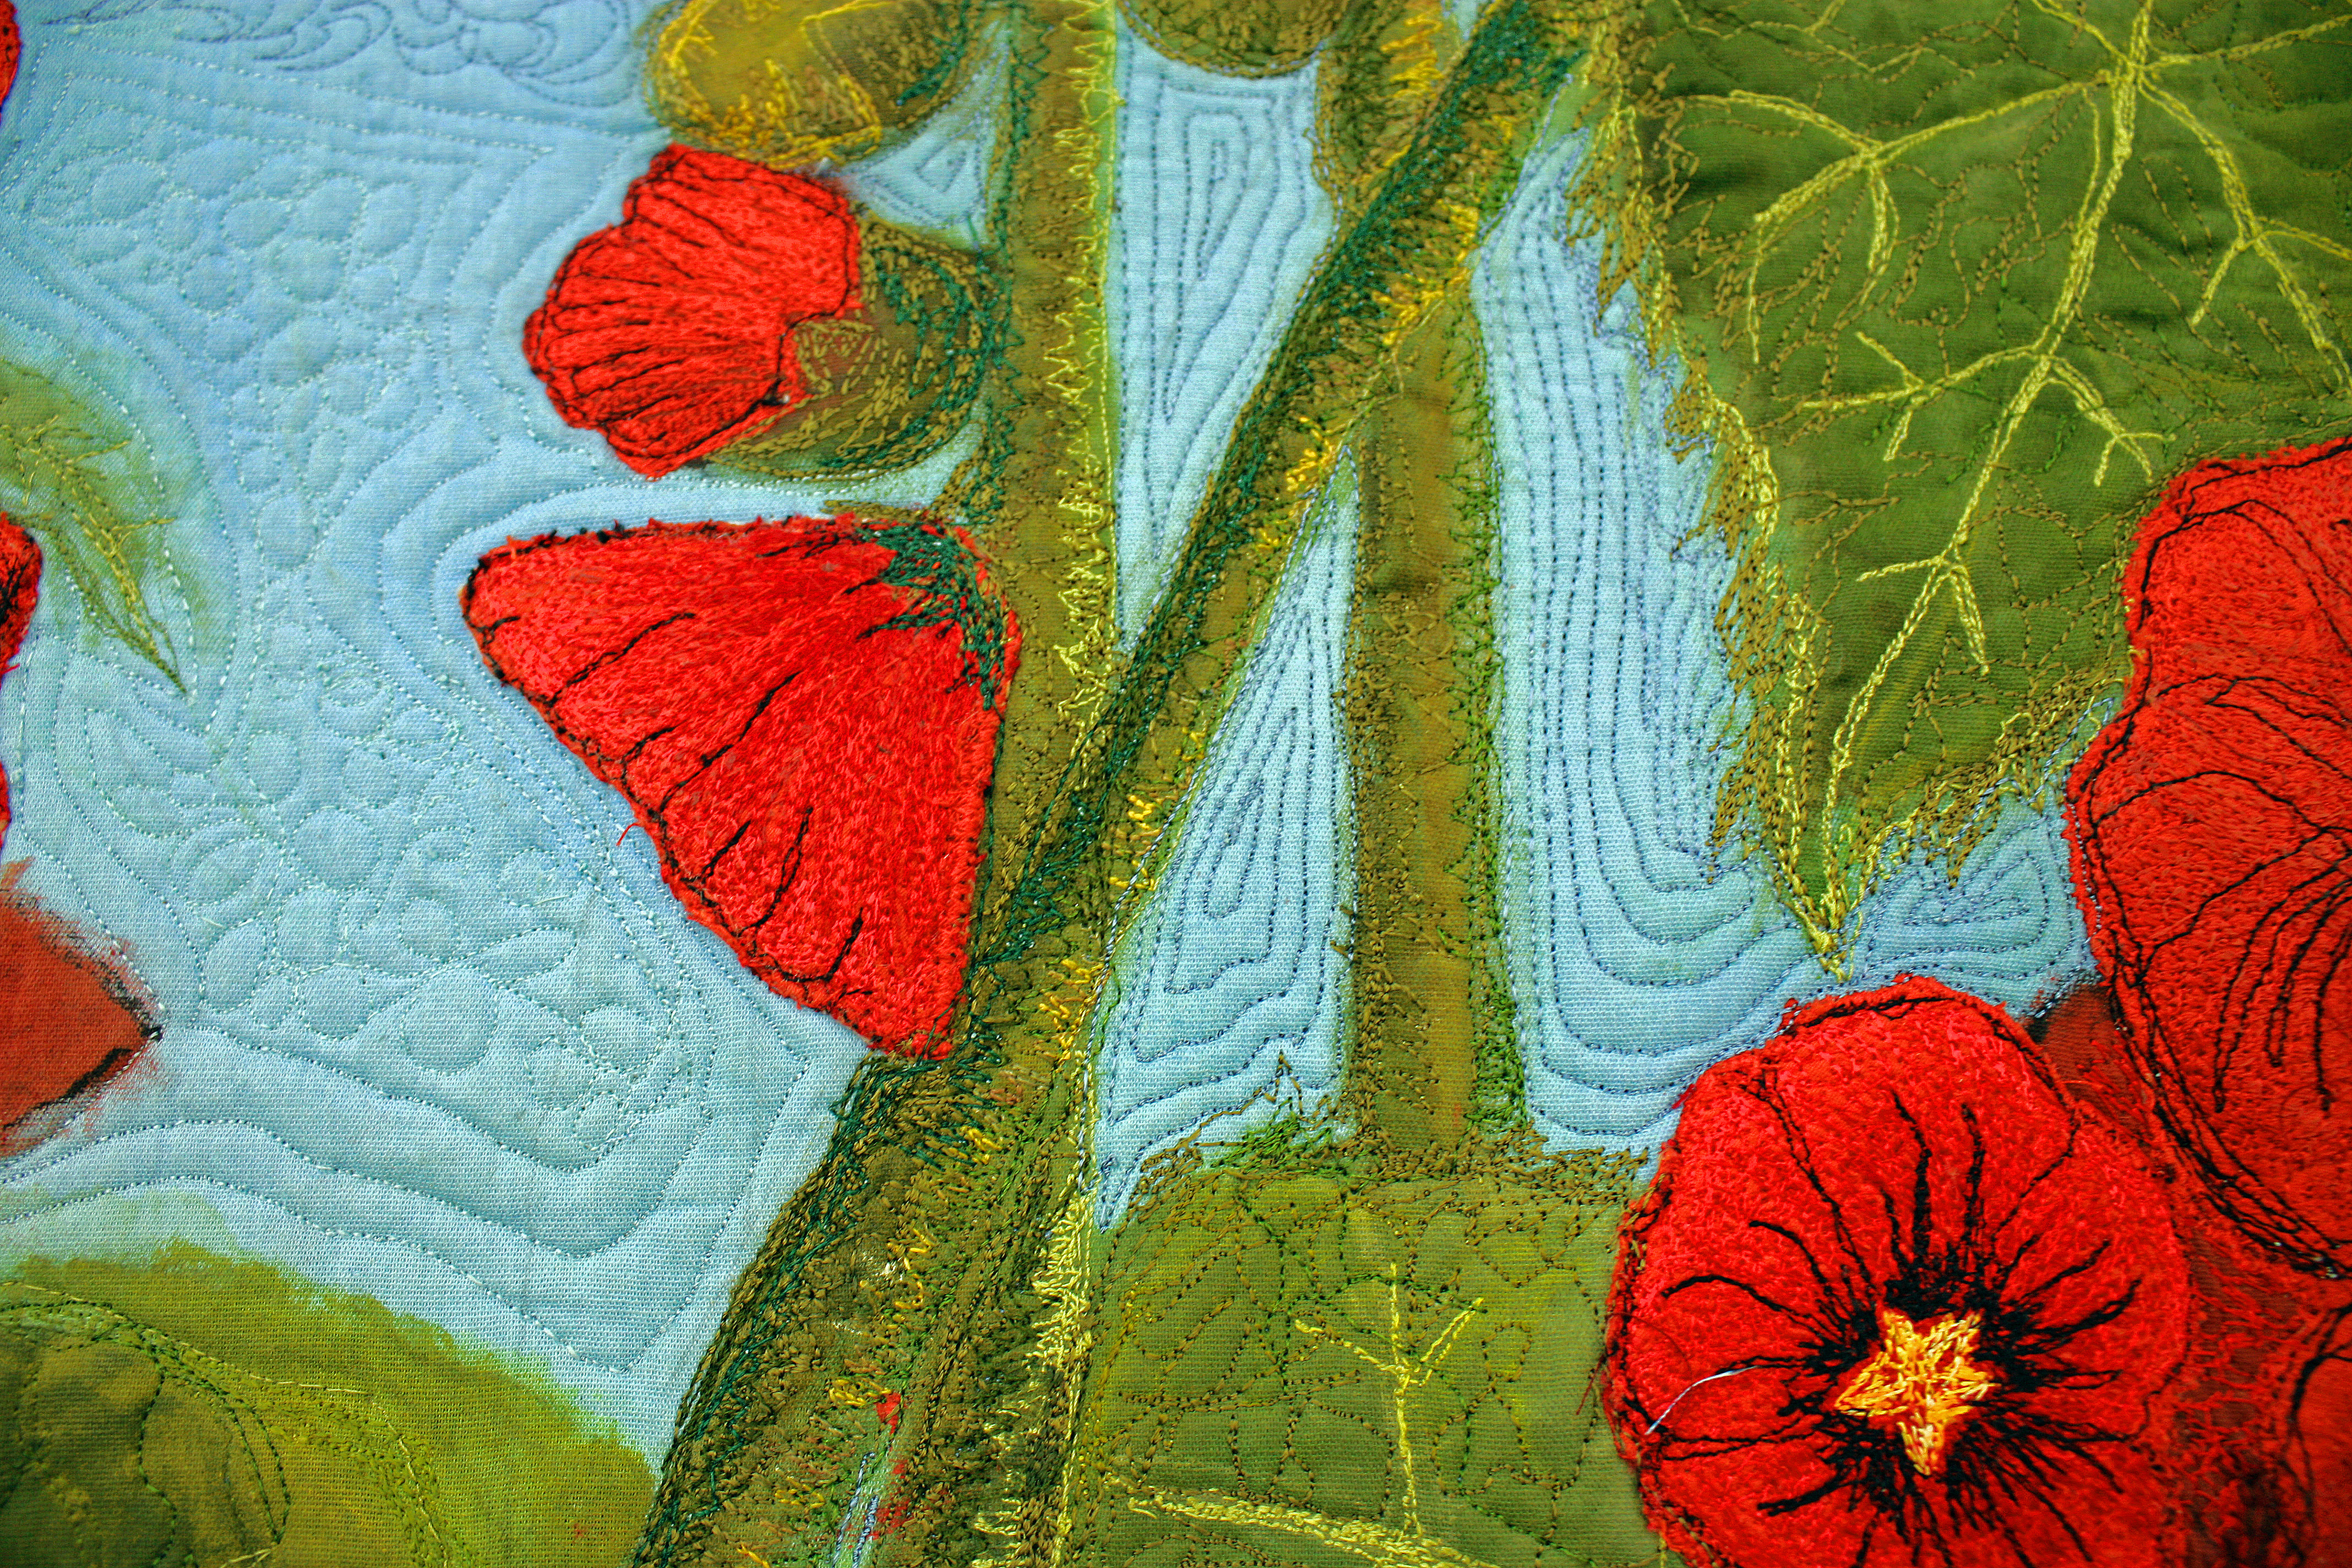
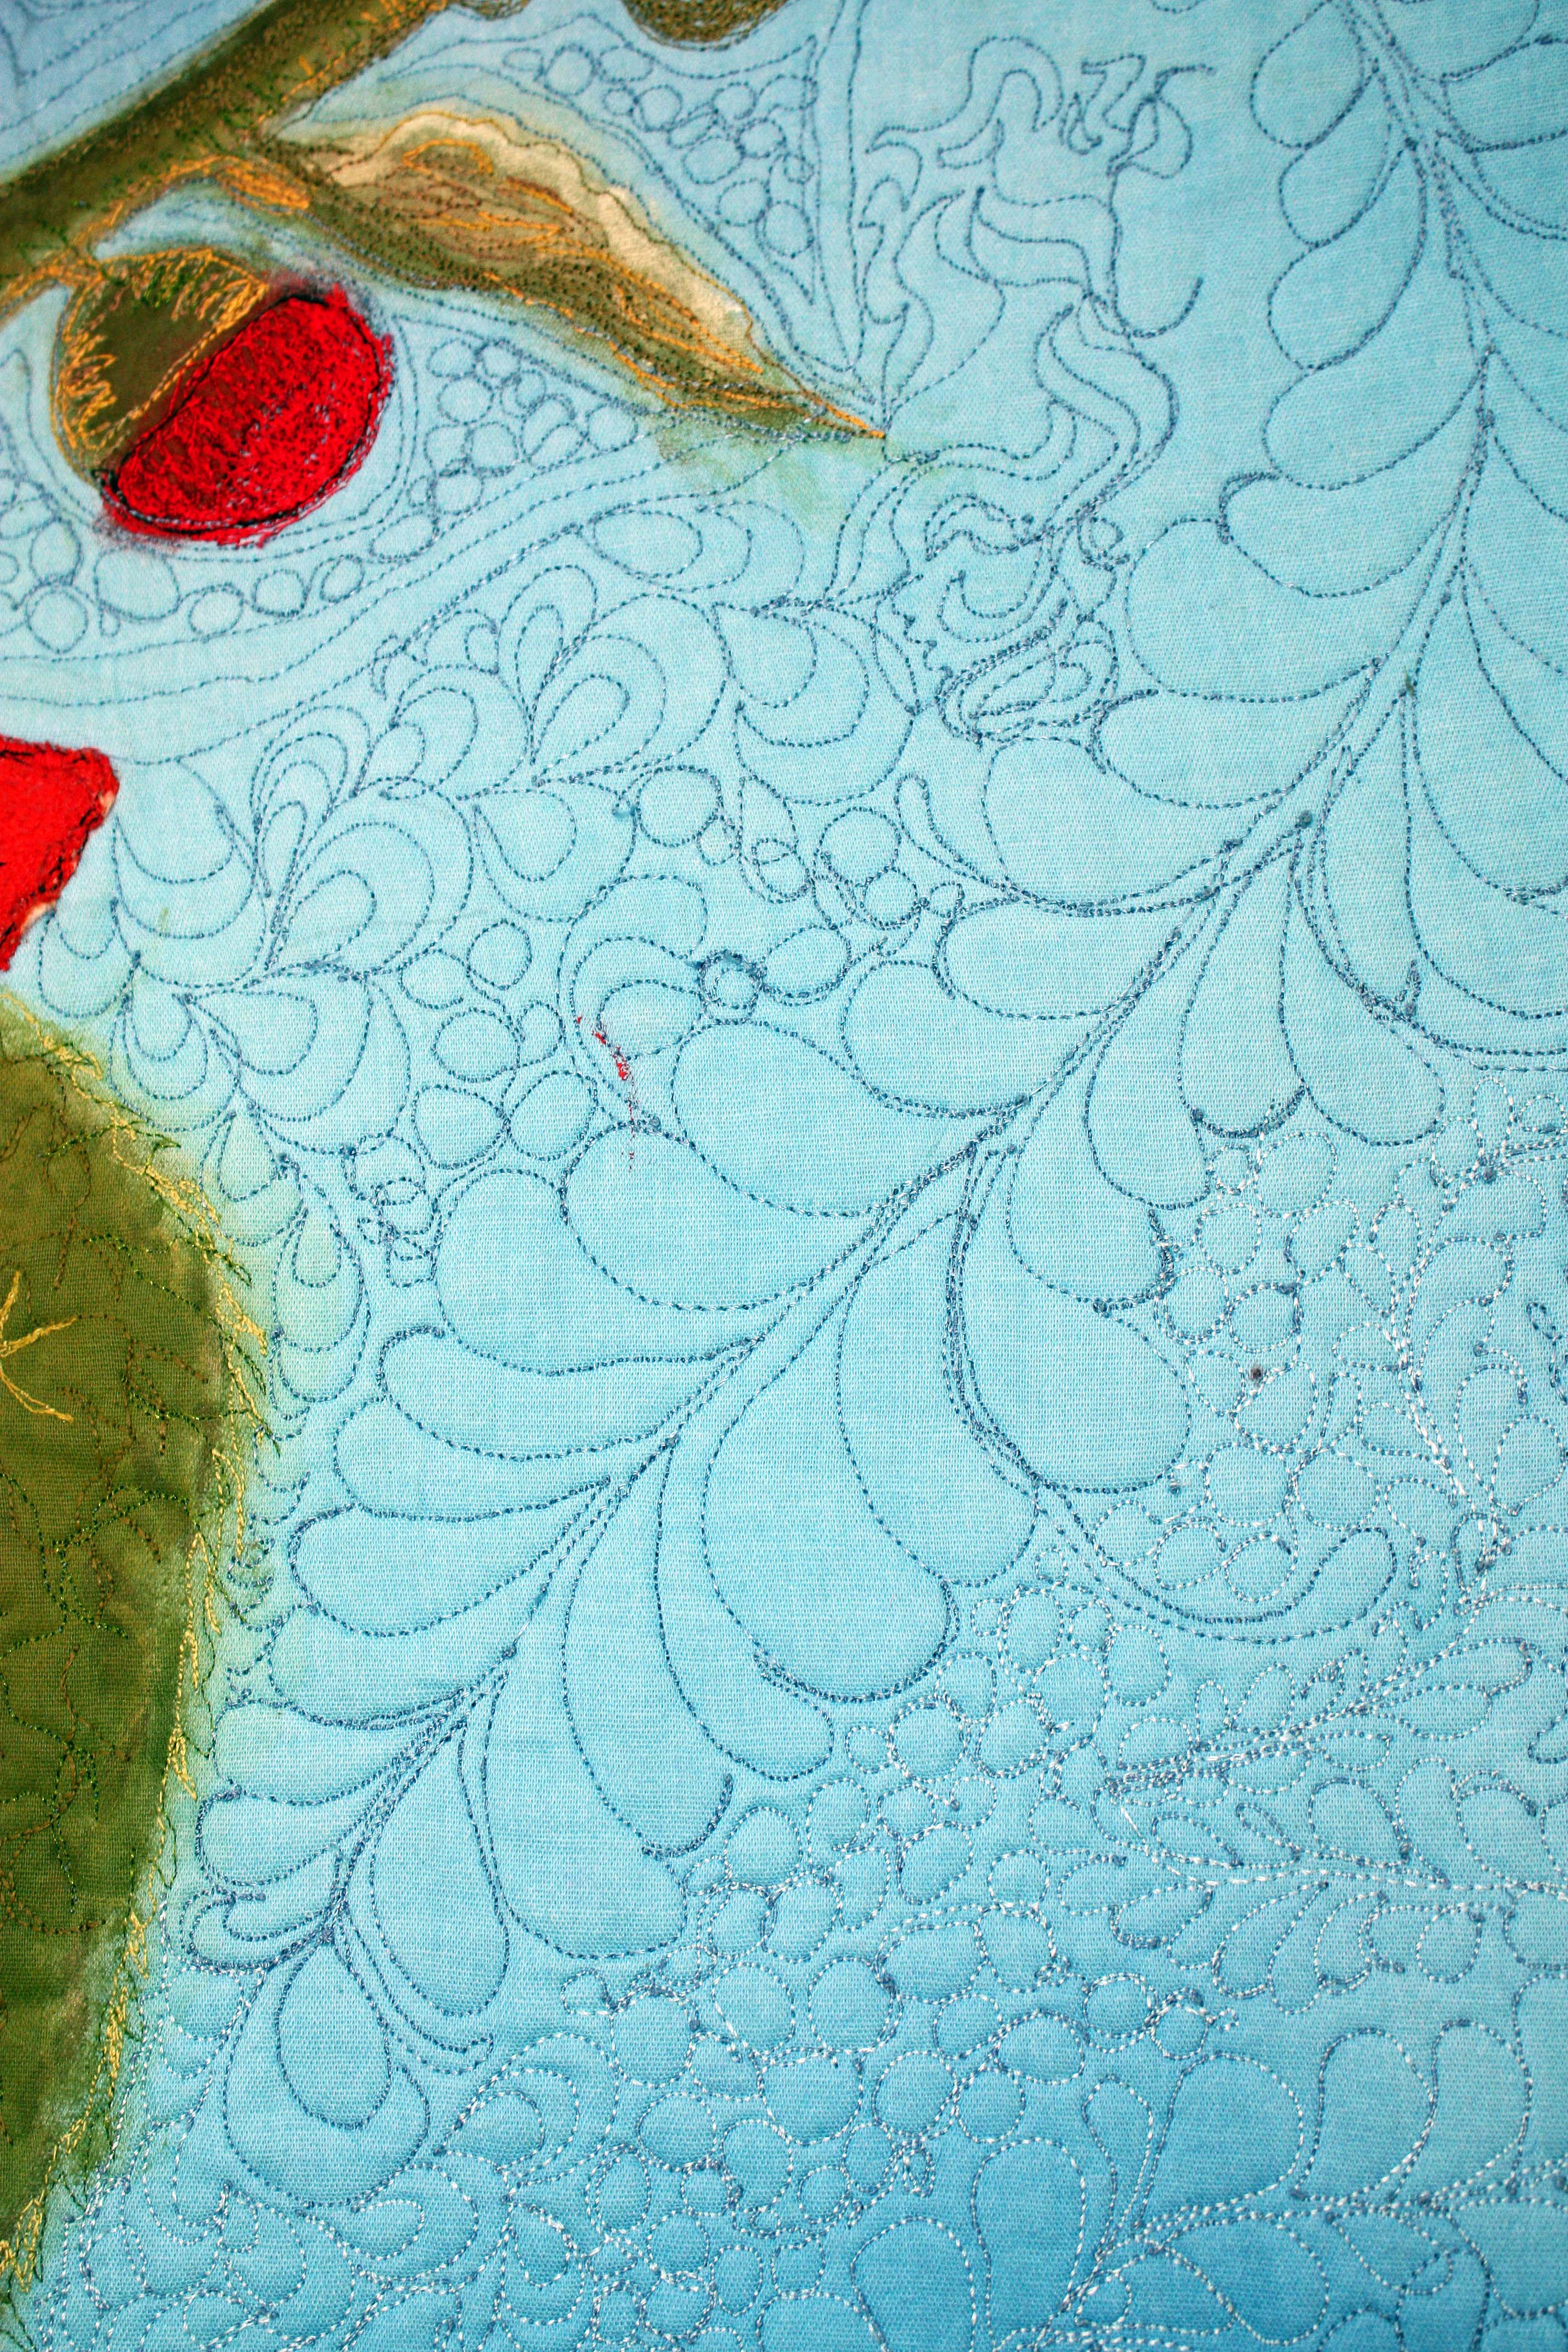
It is a floral art quilt, I added a slightly contemporary spin, a little non traditional approach to a floral theme. I chose to give the flowers and stalks a disproportional profile. As my husband observed, this is how the large would appear, seen through the eyes of a tiny bug, dwarfed by it’s hugeness. I thought it might work, a cute little ladybug, that you would barely notice. But first, I needed to run the idea by Karen, the lovely lady who had commissioned the piece, how would she feel about this? She liked the idea and so my little ladybug became a part of this quilt. And that is how the red hollyhock art quilt came by it’s title “A Bug’s Eye View”.

You’ve seen the progression, here is the finished version. You may notice that the ladybug is missing, she truly was a last minute addition. I had already taken the final photos.

But after she was added into the picture, as I stared at the quilt, evaluating it, I realized that she was indispensable. She needed to be right where she is, looking up at the great big world from the ground, viewing a group of red hollyhocks.


I added texture to the leaves, they are not just visually dimensional, but have actual texture and dimension.

Barbara Harms Fiber Art a art quilt A Bug's Barbara Harms Fiber Art finished red hollyhock quilt top


Barbara Harms Fiber Art contemporary floral art quiltBarbara Harms Fiber Barbara Harms Fiber Art detail of the quilting on the hock art quilt


Barbara Harms Fiber Art a fiber art quilt with thread painted hollyhocks
Closer view of quilting


.

Barbara Harms Fiber Art red holly hocks art quilt

IMG_Ladybug quilt, landscape quilt, lady bug, hollyhock quilt


Barbara Harms Fiber Art modern art quilt
One of the thread painted hollyhocks


Categories
Abstract and Geometric quilts Older Posts-

“Wonderland Revisited”, “Well I had fun”.

Wonderland Revisited an art quilt , looking for Alice

Here’s the latest art quilt that I’ve been working on, like a busy little bee, these last few weeks, well maybe a month. In any case. It’s done, it’s done!

I made it with the intention of a companion piece that harmonized with my last quilt, “Down the Rabbit Hole“.  This ones entitled “Wonderland Revisited”.

And, yes, it’s bright, it’s colorful and it’s bold., too much? Well that depends….my teenaged granddaughters, and as we all know, teens are not noted for their fondness for dark dismal color choices, many actually seem to love the most outlandish styles [ a disclaimer this is a general observation , not referring to my girls] when I asked these two normal teenagers if it needed a little more colored thread work in a certain spot, were slow and careful in their response,”Well……grandma, it  IS pretty colorful already”. This said in a voice that told me everything, ” Be careful, we don’t want to hurt Grandma’s feelings. But clearly she has lost my mind”.  One of my  younger grandsons  was watching me in my workroom. I said ” So what do you think?” referring to the quilt.  He paused for a long time, thoughtfully looking at it, weighing his answer.  Then he finally said,” What is it?”. I said sometimes things don’t have to look like something, he clearly did not agree, but he wasn’t going to argue the point with someone who obviously didn’t have a clue.

These little encounters with younger ones told me that it might be a little bright for some folks. My reaction is similar to contestants on American Idol, who have just received a particularly  brutal review by the judges. When asked to comment  usually say, ” Well I had fun”. So if it is a little too bright for some folks, and I ‘m sure it might be, ” Well I had fun”. And I did!*

Some of the strange fauna Alice encountered. Made with hand painted silk and applique,
Thanks for the shared trip to Wonderland with us!

*With many thanks to the amazing quilt artist Ellen Anne Eddy. She has led the way for many of us color addicts to come out into the open and  feel free to be as colorful as we want.Her new book is called “Thread Magic Garden”. If I were a book reviewer I would surely give this one at least a 9. She has beautiful pictures, oh la la,.She has so many wonderful colorful illustrations included in it, it will inspire you to to try color and have fun with your quilt t. But 1st and foremost she has created a book with such understandable, clear instructions, illustrating each step of the way with very clear and helpful  photos. You will LOVE this book.

Categories
PHOTOGRAPHY Uncategorized

Is this a blog about art quilts or photopraphy?

This is a Fiber art blog definitely an art quilting blog.

I think it is clear that I enjoy photography as well.  In fact my photos aid in making my art quilts.Photography is an art form as well.

Art can be passed on through heredity, there were several commercial artists in my family, as well as some very talented amatures. Must be that  left side/ right side brain thing. There it is, hate math, live art, that’s me.

We can agree that one art form can lead to others. So here’s an example of that point.

 Since I have a captive audience, { well I suppose you can leave, but I hope not} I’d like to share  a few photos I took in early spring, of  some local ferns with their new fronds emerging

I have a little announcement/plug to make. As you may well know, I am soon opening my own art web site. Exciting and scary for me.  I plan to keep

my etsy shop open as well, http://etsy.com/shop/BarbaraHarmsFiberArt/. I’ll carry many non art items such as table runners, bed spreads, baby quilts and a section for fine art photography,  high resulation art prints. I hope you will be willing to support my new website, which I’ll give further details soon, as well as my etsy shop  http://etsy.com/shop/AsianArtAndQuilts/

Categories
Abstract and Geometric quilts Older Posts- Uncategorized

Impressionist Art Quilt; Impression Sunrise In theThe Garden

This is hand painted silk.with all the flowers hand painted and appliqued on. In case you didn’t notice, there a lot of those funny little abstract flowers.Yet, this was a fun quilt to make.
In the spring, I like to have my first cup of coffee in the garden, admiring the flowers. The colors seem lit from within. The air is heavy with fragrance of the flowers, it lifts you off your bench. to smell and look at each flower.
I wonder if Monet did that in his garden at Giverny?
An image of Claude Monet in his garden in Give...
An image of Claude Monet in his garden in Giverny with an unidentified visitor. From The New York Times photo archive, dated only 1922, author not given (the image presumably in a Times December 24, 1922 profile on the painter). (Photo credit: Wikipedia)
Categories
Uncategorized

Raw edge applique tutorial demo on two art quilts part 2


Where we left off on this tutorial & the making of two art quilts was all the bits and pieces had been cut out and fused to the background fabric. But now we need to finish the edges to prevent fraying and make it more finished looking.

You can see the larger pieces are fused down ,

You notice that the pieces have been layered yet the top layer with daisies is as yet unattached. You have 2 basic choices to finish the raw edges. You can sew a single line outlining each piece. Often this is done in a clear poly or nylon thread. There are a few brands, all good. Or outline with the color of each piece, a lot of thread changes here.  On either of these two choices you are using a straight free motion stitch.

Free motion stitching  is not as hard as the reputation it has received. A little practice to get the hang of it until you feel confidence is all that you need. As Diane Gaudynski, one  of a small talented group of machine quilters, who quite literally are the best of the best in the field, Keep quilting – your work gets better every day!”..If anyone’s knows, its Diane. Diane’s link is listed & I have an interview with her in the archives.

Here is a fast version. This post isn’t focusing on that subject, I”m taking for granted you have some knowledge on free motion quilting. So this is the speed version. Step 1- drop your feed dogs, the teeth that feed your fabric along under the needle as you sew. Without working feed dogs, how will the fabric move? You guessed it! You! You’ll move it with your own 2 little hands. The advantage is you can move the fabric in any direction, creating designs, outline curves, as we are doing and much more. For this process you will need a darning foot, or free motion foot as it is also called. There is a spring and an open front. You need to see where you are going..+They can be lowered by a switch on the side ot back on most machines. Or simply cover them up,

 
English: Singer model 27, closeup of feed dogs...
Here are those feed dogs that you are going to drop image via Wikipedia

step 2- adjustments to upper tension,  check your manual for the recommended setting and make adjustments as you continue, because there are many factors that influence the number. Play with your machine and find what works.

Step 3-You’re off….whoo whooo….Once you’ve gained a little confidence your goal is the sewing machine speed on the fast side, while you are ignoring that racing engine  sound,  are attempting to move the fabric  slowly and steadily. Do not keep pace with the machine’s speed. Slow and steady as she goers.

I left out tons of info, like pulling the bottom thread to the top, quilting machine gloves. threads, , on and on.Go get one of  Diane’s books, I recommend,  ” Guide to machine quilting”, it was the best one I read when I was learning.

Pressing on The second method of finishing the edges is to use a  zig zag stitch on free motion with a narrow width, I often go with a setting of 1. Starting off go a little wider to help stay on the edge of the fabric applique and connect with the fabric underneath. Go slow if you need to. If your applique pieces are fairly straight and no sharp curves or turns , you could zig zag the usual way  with your dogs up.It looks nice, but if you can’t follow along the edges, not so much.

Here’a some assorted pictures of the Lazy Daisies  at various stages

Do you see a obvious proble here? The stitches are spaced too far apart. It doesn't even cover the batting I used here for puffiness. Change your setting to make them closer together.
Notice the 1st setting obviously sets the width. 1.5 is OK. The 2nd one sets the denseness, or how close together the stitches are. This is better that the one used above. Regular Zig zag

Next layer started, placement and finishing the daisies.
Looks like everything's fused down and raw edges finished.

Next post; thread painting on Sunflowers.

Categories
Blog posts Interviews 2 Older Posts- Uncategorized

Sneak Preview-Susan Brubaker Knapp

Susan Brubaker Knapp

Susan Brubaker Knapp is a fiber artist whose work has gained a great deal of recognition. We  see her often  in magazines like Quilting Arts and many others. She has several excellent DVDs & books, which offer practical help & are  “must haves'” for your quilting library.

Her thread work is phenomenal. Her art quilts live up to all the attention they receive & then some.

If all that weren’t enough, her new book just came  out. Here’s a peek at it, because you’re going to want this one

Susan’s new book


If you haven’t guessed by now, she has graciously agreed to an interview here, so look for that coming soon. I know I’m excited!

Categories
In Progress Older Posts- Uncategorized

Starry Night a new commissioned quilt

A few pictures of a new commissioned art quilt I’m working on for a very sweet customer. This is her 2nd commissioned order and we’re planning a third. I love commissions, customers come up with ideas for quilts that never occurred to me. It is fun to get a fresh perspective and to run with their idea and make it happen. Many of my favorite quilts have been commissioned ones. This one is no exception, she wanted a starry night sky. I would not have thought of that, but it was the funnest quilt to work on. Here’s some pictures of the almost finished quilt.

Hand painted silk art quilt, with applique